All downloads on this blog are for The Sims 2 and sometimes The Sims 4 only. They will not work with The Sims 3.
If you would like to convert them for either Sims 3 or Sims 4 then please feel free to do so. All I ask is that no TSR or Adfly be used with them and for you to send me a link so I can enjoy them too :)
*NO PAY SITES! THIS INCLUDES TSR!*

-I am trying to add links to any Sims 3 conversions that I know of. If there isn't one linked at the top of the original post then either there isn't one or I haven't seen the conversion yet. If you know of some then please let me know :)-

Some Downloads were removed by Mediafire and I have contacted them. If you run into something you want that is gone let me know and I will upload it somewhere else. Everything should be back ASAP.
Showing posts with label Tutorials. Show all posts

Tuesday, November 26, 2013

Meshing 101: Keeping it Simple Pt.4

Part 4: Packaging, Recoloring, and Testing of a Chair
(Click on Images to Enlarge)

If you were able to follow my last part and are ready to put you package together then you have come to the right place. I am going to explain how to clone an object and build it to hold your mesh file. I will then show you how to recolor the mesh and how to test them in game. 

Before we start I suggest you take a look at this about modifying the TXMT since I will not go into depth on this since I have already found the ones I like most. http://modthesims.info/t/316260

Chapter 1: Making the mesh file.

Open up SimPE. You might get a error message when loading. If you do just click ok. This is how my SimPE is set up.


Yours might look different but all the parts should be there, but to be sure I will tell you what you need to have visible.

1. Object Workshop - If this isn't already visible then you can open it by going to Tools -> Object Creation -> Opject Workshop
2. Plugin View - This should be at the bottom where mine is located though you might have to switch between some tabs at the bottom until you find it.

The other parts should already be visible by default.

3. Resource List - This should be located at the top center part of SimPe.
4. Resource Tree - This should be to the left of the Resource List.

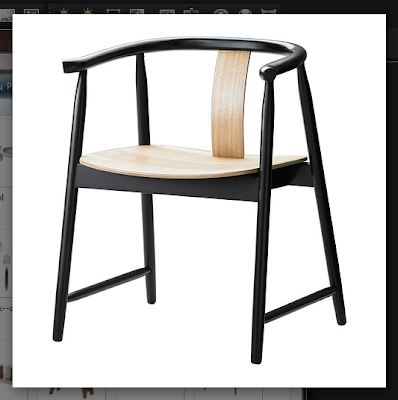
Once all these parts are visable we are going to start. In the Object Workshop you have two options, Start and Open.... If you click on Start then you will be given a list of Game Objects which came with the game which you can choose one from to clone. If you click on Open... you will be able to choose an object from your own computer that you would like to clone. For this I am going to use the Open... option and then I am going to find my Ikea Inspired Nook chair and open it. (Feel free to clone any of my meshes if you are making a new object. I don't mind.) You are then given an option to either clone or recolor the mesh you selected, for now we are going to select the clone option, you might want to make sure your options are like mine shown in the .gif., and click start. You can now give your mesh a name, price and description. Fill this in as you like and click on the Finish bottom at the top of the Object Workshop. It might take a minute for it to load.


A little window will pop up called Scenegraph rename Wizard. This is were you can give your package a unique name. I am going to change the first part of the ModelName to ikeainspireddiningchair. Then I am going to click "Update" and once it finishes I am going to click ok. Give your mesh package a name, mine is going to be IkeaInspiredDiningPt2-Chair_Mesh, and save. It is always a good idea to mention that it in a mesh file in the name so that you and others can find it again later to make recolors.

Now we can start rebuilding the package to out needs. The first thing we are going to change is the Guid. This is your objects foot print, not the squares that show in game but more of a invisible one. So in the Resource Tree you want to click on the "Object Data" tab. In the "Resource List" you will see an item appear. Some times there might be more then one but for a chair there will always just be one. Click on it and in the Plugin view you will see the "Object Data Editor". There you will find the option called GUID. Open your SoftFuse Program which I linked in Part one and click generate (make sure you have the setting set up like I explained in Part 1 or else it will not work!). Copy the the password given and copy it into the GUID field after the x. Check the option "Update all MMATs" and click Update and Commit. I tend to save it here.


In the Resource Tree click on Geometric Data Container. Click on the item in the Resource List. We can now import our .obj mesh file. In the Plugin View click on Import. Find you chair .obj and open it. A window will pop up called Mesh Group Importer. Here you can choose which group will become which subset. My chair has 3 groups; seat, frame, and plane02. Click on one of the groups and on the right go to "Group Settings" and change the Action to Replace. Choose which subset you would like to replace with that group and then move on to the next group. When you have replaced all the subsets click ok. Click Commit at the top of the Plugin View. A window will pop up, just click ok. Go a head and save again.


Now we can add our textures to the mesh. In the Resource Tree click on the Image Texture tab. You will have three items in the Resource List. Click on the top one. In the name you can see it is for the chair subset. We replaced that subset with the seat group so this texture needs to be for that. Right click on the image in the Plugin View and click on Build DXT. A new window will pop up. On the left hand side you will see a option that says open Image. Click on that and choose your Seat texture. Your texture will now show in the little window. On the right you have some options about how you want to process this image. I usually only change the Format option. I suggest you keep this either on DXT3Format or DXT5Format. If you are adding an image which had little detail then you might be able to get by with DXT1Format. For this one I am going to keep it on DXT5Format. Click build when you are ready. Click on Commit at the upper right side of the Plugin View. A little window will pop up again, click ok and move on to the next item in the Resource List. The next item in my list is the groundshadow texture. I am going to do exactly the same as before but when after I have built the DXT I am going to change the Format on the left side in the Plugin View to ExtRaw8bit. I then right click on the image and select "change all sizes". You only have to do these last steps if it is a shadow texture, all others are done like the one before. Click commit and continue down your Resource List doing exactly what you did before. Save you file again.


Now we are going to check our textures on the mesh to make sure we built them onto the right part of the mesh. Go back to the Geometric Data Container in the Resource Tree and click on the item in the Resource List. In the plugin view check all of the items in the models area and click Preview. This might take a moment. You mesh and it's textures should be visible in the area to the right. Make sure everything is to your liking (this isn't how it will appear in game) and save.


That is all I am going to do for this mesh but like I said in the beginning I've already found the Material Definition (TXMT) that I like, but if you like you can play with them using the information I linked earlier.

Chapter 2: Recoloring

Now we can start recoloring it. In the Objects Workshop click on Startover at the top. You will see the same options as we did in the beginning. Click on Open... and choose the mesh file we just made. This time we are going to choose the Recolor option. Click Start and give it a name. I am naming it IkeaInspiredDiningPt2-Chair_RC1. Save it. A window will pop up called Subset Selection. Here you can pick which subset you want to recolor. Check which ever one you want (I am doing both) and click ok.


In the Resource Tree click on the Texture Image tab and then again on the item in the Resource List. We can now add another texture we have for this subset (the seat) just like we did for the mesh. Do this for all the other items in the Resource List, just make sure you commit inbetween them, and save.

Follow these steps for any recolors you want to make and then exit out of SimPE.


Chapter 3: Testing The New Mesh

We can now add the packages we just made to our game and start the game.

Load a lot and find your object in buy-mode. Place it on your lot and have a sim interact with it. Play with it a little and make sure it interacts with everything ok. Check your recolors as well. When you are satisfied with how it is working and sure it has no glitches then you can continue playing for upload you freshly created packages for others to enjoy.

 
I hope this set of tutorials was understandable and easy to enough follow. I plan on making more of these as I make different things so that you will know how to make something more than just a chair.
read more "Meshing 101: Keeping it Simple Pt.4"

Thursday, November 21, 2013

Meshing 101: Keeping it Simple Pt. 3

Part 3: Meshing, UVMaping, and Texturing of a Chair

Please excuse any spelling or grammar mistakes. I wrote this over the course of a week and I'm sure I missed something.

Click Images to enlarge.

Today I am going to be working on my 500+ Tumblr Followers Gift.

I separated everything into chapters to keep it organized. You can also skip a head if you understand what I am talking about in a certain chapter.

Chapter 1: Preparing to Mesh

I am going to start with a dining chair I found at IKEA's website that I absolutely love. This is the first step; find your inspiration. I saved the image I found to my computer so I could go back to it as needed and look at it.

Here is that picture. It is Ikea's TRENDIG 2013 Collection Chair.


Sometimes you just have this image in your head that you want to make but you aren't sure if it exist. When this happens I try to sketch out something that I can use as a reminder. I suck at drawing so when that fails me I try really hard to find something similar online.

Now that I have my inspiration I am going to open it up in my photo editing program (PaintShop Pro X4 for me) and I am going to analyze it. I try to imagine what the best shape is that could use for each part.

For this image I see four cylinders for legs. I also notice that they are slopping at the ends. This tells me that my cylinder is going to need more then one stack (how may cylindrical parts are on top of one another). Now I need to figure out how many slices I want it to have (think of a round pie that you are cutting, how many slices will that round pie be. This also affects the smoothness of the cylinder.).

After thinking about the size of the legs to the over all shape I think that the best way for me to make the legs is with a cylindrical shape with 3 stacks and about 8 slices. The legs are also connected by 2 spokes that have the same shape as the legs.

Under the seat I see two rectangles with possibly on two rectangles connecting them. These will be easy to make with the box shape.

For the Seat itself I see a rounded rectangle with a slight sloop in the middle. I will make this using the cylinder tool again with the settings 1 stack x 20 slices with the "close with triangle strip". I will then manually move the vertexes around using the scale and move tools. The same goes for the little piece of wood on the back between the seat and the arms/back rest.

Lastly for the arms/back rest I see a long cylinder which is slightly flattened for the back rest. It is also pretty wavy. For this part I am going to use a cylinder with the same amount of slices as the legs (about 8) but since it is more curved I am going to use more stacks. I am going to guess that it is going to need about 14 stacks total to get this shape. To insure that the sides are the same I will mirror which ever side I make first, about 7 stacks, so that they two arms are identical.

So after analyzing the picture I now know I will need:

6 cylinders which are 3 stacks by 8(ish) slices.
1 cylinder which is 7(ish) stacks by 8(ish) slices.
6 manually edited planes to make the seat and back.

After breaking it down like this it becomes much easier for me to make it in MilkShape. They use to call this an action plan when I was working on projects in collage.

Chapter 2: Meshing In MilkShape

Now we open Milkshape. I am going to zoom in (shift+scroll) until I only see one square per screen. In game a one wall is three squares tall so most items will be less then that.

Now I'm going to start by creating a leg and shaping it. So I click on the cylinder tool and change the stacks and slices to 3 and 8. I then use the scale tool to lengthen the gap in the center and tapper the ends to my liking. Lastly I am going to delete the tops and bottom to the leg since these won't be seen and will save a few polys. When selecting more then one vertex which are not next to one another just hold down shift.
 

 And then we had a leg. I am going to use this as a base for the other legs and spokes but we will come back to that after we UVMap it later. Now we are going to work on the seat. So I click on the cylinder tool and make a cylinder of 1x20 with the close with triangle strip option. use the select tool to select the 2 faces on the ends, next to the single vertex and delete them. I then use the extended manual edit to move the single vertexes over to meet the line between the 2 vertexes next to it. I use the extended manual edit again to move the top and bottom vertexes so that they line up with the ones next to them. Now I use the scale and move tools to make a rounded rectangle shape. 


 This is the base for the seat. It will probably need some tweaking later but for now we can move on. We are going to make the back/arms now. I will do this the same way I did the leg. First I make a cylinder with the options 7x8 over that of the leg so that they are the same size around. After moving it over I will use the scale and move tools to get the desired shape and size I want. Then I remove the end on the top since like the chairs it won't be seen and will save some polys.


 Believe it or or not we are now ready to start UVMapping the objects that we have Most of the meshing from here on with be mostly duplicating and moving the things we have now. I like to UVMap it before building the mesh if I can so that I can get nice straight lines. It will make the texture look better on the mesh. First I am going to name the groups so I can find them more easily in the UVMapper. I will then export it as a.OBJ file and save it with the name "chair.obj". It is also a good idea to save your progress as a milkshape file, just to be safe.

 Chapter 3: Starting to UVMap

Lets open our UVMapping program, I am using UVMapper Beta. Then open up your Chair.obj file.

At first it will look like a huge mess. To make it a little more manageable I am going to separate the groups. To do this I am going to go to Edit -> Tile -> By Group. I check the "Gaps in Texture Map" selection so that there is space between the UVMaps and then OK. Now it looks a little neater.

Now I am going to remap each object to my liking. Go to Edit -> Select -> By Group and choose your group which you would like to remap, I am going to do the "Arm" group first, and click ok. This will highlight that group. Since this group was made from a cylinder with an end I am going to map it like one. Go to Edit -> New UVMap -> Cylindrical Cap. A window will pop-up so you can choose from which point of view you want to map your group. I am going to keep it as the default since that is what I need, but feel free to play around with this until you find the one that you like most. So I am going to click OK.

Since all of the groups I made are cylindrical I am going to use the same steps again until all of my groups have been remapped. If you have used other shapes then I would choice the mapping option which suits your group better. Play with this and have fun.

 Now I have maped the groups I had, now I am going to tweak them to my liking. First I am going to click and drag my mouse around the bottom rounded rectangle of my seat UVMap and move it over the top one, I find it easier to do this in full screen. I am then going to select both of those and go to Edit -> New UVMap -> Planar. Once again I am going to use the default of the Y Alignment. I am also going to check the "Do Not Split" option. This will give me a straight on point of view for the UVMap so the two ends will be mapped in the same area and use the same texture later. I also notice that I missed a part of the arm top which we removed I will remove that first thing after we go back to MilkShape

That is all we are going to do in the UVMapper for now. We will come back when we have some more parts to our mesh, but we won't be changing these uvmaps anymore. So lets save our model. Go to File -> Save Model. A window will pop up, just click ok. Now give your model a new name. I am naming it Chair2.obj.


 Chapter 4: Back To MilkShape
Re-import the mesh back into MilkShape using the File -> Import -> Wavefront OBJ. Find your file that you just saved in your UVMapping program and click open. Now I am going to remove those faces I forgot. I am going to start duplicating the legs group (ctrl+d). In the groups tab I am going to double click on the leg group and duplicated it once so that I can then scale it down and rotate it to make a spoke. I am going to rename the spoke in the groups tab so I can keep it tidy.


 Now I am going to I am going to shape the seat to give it a slight curve. I will do this with the move tool. I am then going to duplicate it, rotate the duplicate, and scale it to make up the back of the chair. I rename this part as well in the groups tab.


 We can start building part of the chair now. I am going to use the move tool to move the seat up to the height I want then I am going to slant the chair leg slightly by rotating it freely (have all the axes checked and dragging with the mouse) until it is to my liking. Then I move it into place using the move tool. Once that looks good I am going to duplicate the led and mirror it from front to back then left to right and back to the front. Then I am going to move the spoke into place and adjust it as needed (scaling), then duplicate it and mirror it to the other side. Once that is done I am going to move the back up to the proper place and tweak it as needed, then I will tilt it slightly. Time to rename all those duplicates now in your groups tab.


 Now we are going to add the rectangles which are holding the seat up. I am going to do that by making a box and scaling it to the right size. I will also use the move tool to move it to the right spot. Now I am going to scale the bottom of the rectangle to give it a slight tapering. I need to move it again to make sure it is aligned right. We will create the rest of the rectangles once we UVMap this one. For now I am just going to rename it in the groups tab and move one to the arms/back.

For the back/arms I am going to rotate the mesh and start rotating and moving until I get the shape I want. There isn't really a way to explain what I am doing besides that. When that is done I am going to move it into place and tweak it as need to fit where I need it. Once I have it in the shape and size I want I am going to duplicate it and mirror it and move it into place. I check the back vertexes to make sure they are lined up correctly then I weld them together. Lastly we are going to rename the duplicate in the groups tab.

Chapter 5: Finishing the UVMaps

Now I am going to separate the subsets I want my meshes to have. One will be the legs, back/arms, and the little pieces under the seat. The other will be the seat and back part. Make sure you save your mesh before you do this. Either export it as an .obj or as a milkshape file. Then I am going to select the pieces of the mesh I want to be in one subset and delete them. I then save the other pieces as a new .obj (frame). Simply press ctrl+z to make the other pieces come back and do the same again, this time delete the pieces you just saved and save what is left as a new .obj (seat).  


 I am now going to open each .obj in the UVMapper and tweak the UVMaps to my liking. For the most part I will select the group or groups I want and move them over and re-size them since I did most of the actually UVMapping earlier. Any duplicate you made will automatically have the same UVMap as the one you duplicated it from. I am going to start with the seat. I load the .obj and go to Edit -> Select -> by group. I select the "back" group and click ok. As you see it selects the same area as the seat group but since I didn't regroup them I can move the back group over without messing up the seat uvmap. Now I am going to re-size this UVMap since the back is smaller then the seat. I do this by dragging the edges over. Once I get the scale I like I select just the rounded rectangle shape of the back and make it thinner, I'm going to go into full screen for this. When the scaling is to my liking I am going to move the back group over to below the seat group and select them both I am then going to re-size them (by pulling the edges) to make them fit the whole screen. I take it off full screen to see how it looks in a plain square. I am going to tweak the back group a little more to make it longer. I am going to do the same to the seat group to make it more of a rectangle. Since I re-sized the top of the seat I really should re-size the sides, but as you can see there is no space. So what I am going to do is put the UVMapper back into full screen and select half of the sides UVMap and move it over and on top of the other half. I then re-size it to a better size that will look better on the re-sized seat. This means that the 2 halves will share the same texture. I take it off full screen once more to see how it looks on a square. If you need to fix anything else you can keep going until you are happy with it. I am happy with this so I am going to save the model as "Seat2" and save the texture map as "Seat" on a 512x512 sized image. That is it UVMaping this subset. You can now re-import it back into MilkShape and regroup the two groups. I will rename it "seat" and make sure you save it. This will be one of my subsets for the finished mesh.


Now I am going to load the frame.obj into the UVMapper. Since we made  the rectangle after we UVMapped the other bits I am going to quickly UVMap it and then save the model as Frame2.obj and re-import it back into MilkShape so I can duplicate it a few times and finish building the frame of the mesh. After I have the basic forum I want to the rectangles I am going to delete the ends (since they won't be seen) and rotate them slightly to blend better with the legs. I finish with any other tweaks they might need then I save it as frame.obj and head back into the UVMapper. You might want to rename the duplicates before saving but I forgot to. It would just make it easier to identify the parts in the UVMapper.

 Now we can build the frame UVMap. So lets load the frame.obj into the UVMapper. I am going to start by selecting the legs and making them narrower and moving them over for later. Then I am going scale the spokes to the right size in comparison to the legs. I am going to separate the legs and pokes now so that they will each have there own texture.You might needed to scale them some more to get them to fit where you want. Once they are to my liking I am going to move on to the rectangles. I am going to serape the longer rectangles and shorter ones and scale them to the right size and move them around until they are to my liking. I am going to keep the arms as they are since I want them to share their texture. You can of course separate them if you like. For now I am just going to tweak everything and rearange it until it is looking good and then I will export it as Frame2.obj and save the texture map at 512x512 as Frame.bmp. We are done UVMapping.


We can now re-import the frame2.obj in MilkShape and regroup everything and rename it. Then we can import the seat.obj. These are our two subsets for the finished mesh. I am going to export these two groups together and save them as a milk shape file just to feel safe. I am saving it as Chair.obj and I will give the milkshape file the same name. We are almost done now but we still need to re-size the whole chair and move it to the proper placement or else it will not work right in game. I am using my Ikea Inspired Nook Chair's obj for this. I will link it here for anyone who wants to use it. I am going to move the mesh that I just made over to the right position then I am going to use the scale tool to make it the right size. Now I can remove the Ikea Inspired Nook Chair's groups. You can keep the plane under the chair for the Shadow later. If you need it bigger then re-size it to fit. Now I am going to save this mesh once again as Chair&Shadow.obj and this will be our final .obj.

 Chapter 6: Texturing

Now we can start texturing our mesh. Open up your Image Editing Program, I am using Corel Paintshop Pro x4. Open up your Map Textures that you saves in the last chapter. You then need to open the textures you are going to use. I am going to match the chairs to a table I've already made, so I am opening the .psd from that. I am going to start with the Seat UVMap. Make a new raster layer in top of the UVMap and add your texture there. What your texture looks like it completely up to you. I am using a wood texture from Goat that I have changed the color of a few times and my normal pine texture for recolors. I will show you have I put the shadows on my textures though. Go back to your UVMap, if you need to you can hide your texture layer, and select the areas outside the lines. On the edges of the seat and back I am going to deselect the two horizontal ends. Then I am going to use the "Drop Shadow" Tool to drop a shadow. In the picture you can see the settings tend to use. Make sure it drops the shadow onto a new raster layer. Drag that layer up to the top of your layers in your layers palette. I fill in the shadow a little more using the fill tool with black that has an opacity of 10. I fill it about 4 times until it matches the darkness of the shadow. You can deselect now and blur the shadow layer slightly. I am done with this texture so I am going to save it as a .png and as a .psd. The .psd will make it WAY easier to make recolors later. I am going to do exactly the same thing to the Frame UVMap except the texture will be going in two different directions. I do this my coping to a new image (ctrl+c then ctrl+v+shift) and rotating it before adding it to the new UVMap.


Before making any recolors I am going to test the textures I made on the mesh and see if anything needs to be changed. Go back to MilkShape and go to the Groups Tab and select one of your groups. I am going to start with "Frame". After I select the group I am going to go to the Materials tab and click new. Click on the first and pick your texture. Click Assign and the texture will show on your mesh. Repeat for any other groups. Now you will see your textured mesh in the 3d preview screen. I notice a few areas that I don't like the shadow on so I am going to go back to my imaging program and fix those then check them again. Just keep doing this until you are happy with it.

 The last thing I am going to cover in this part of the tutorial is the Shadowing underneath the chair. You can also do this around the chair to get shadows on the wall but for the most part they are unneeded for dining chairs so I am only going to do the "GroundShadow". We are going to need to get the UVMap for the plane we left under neath the chair. To do this I am going to select the seat and frame groups and delete them. Then I am going to save the plane as a .obj, I will name mine shadow.obj. In MilkShape hit ctrl+z to bring your mesh back. Now we are going to open the shadow.obj in the UVMapper. Save the texture map as a 256x256 image and open it in your imaging program. This is how I make shadows though you might find a way you like more. First I go back into MilkShape and select the ends of the legs of the chair. Then I make a print screen and paste it into my imaging program. I select the plane in the lower left side and copy it. I make a new raster layer over the UVMap of the shadow and then select the main square. I paste the the copied part into the selection my using ctrl+shift+l. I make another raster layer and move it in between the ones that are there. The shadow works on an alpha plane which means that the darker something is the less it will show. I like to start with the darkest to lightest. So we want to fill the UVMap part in the layers palette in with black. Now on the layer we just made I am going to select the chair by hand and fill it in using a lighter shade. It does not need to be perfect at all. Now I am going to select the legs and give them a lighter shade. Then I select the very ends of the lefts (the red parts) and make them the lightest color. Lastly I am going to blur it with a Gaussian blur. I always set it to 6 for shadows. You can now save this and test it in MilkShape. Check it and make sure it lines up the way you want and see if it needs to be changed any. I am going to go back and add some lighter colors for the spokes. Mess with the colors and shape in your imaging program until you are happy and remember to save.


You can go back now and make your recolors if you want with your .psds and testing them in Milkshape. You can also continue tweaking the mesh to your liking. I did go back and give the arms and back a slight angle but the end product will be saved for when I release it. This chair will be part of my 500+ Tumblr Followers Gift. I will add a link when it is posted so you can go grab it.

That is it for this part, next time I'll show you how to add all off these parts into a package to make a object and we will test it in game to see how it looks.
read more "Meshing 101: Keeping it Simple Pt. 3"

Thursday, November 7, 2013

Meshing 101 - Keeping it Simple pt. 2

 
 Getting to know MilkShape

(click on the images to enlarge)

Before we start meshing I am going to first explain what is what in MilkShape and which of the tools and options we will be using. So lets go ahead and open up MilkShape.

You will first notice that there are four screens. You can set these up how ever you like. Mine are set up as so:

Top Left - Right Side view
Top Right - Front view
Bottom Left - Bottom View
Bottom Right - 3d view

You can easily change these by right clicking on the screen and hovering over "Projection" and then choosing which one you want.


On the right hand side you see four tabs: Models, Groups, Materials, and Joints. We will only be paying attention to the first three tabs. Joints is used for BodyShop meshes.

Under the "Models" tab you have your tools. The top four tools are your Adjusting tools. Lets learn some more about those tools.


Select: After clicking this tool you will be able to select certain vertexes, faces, groups, or joints on your mesh. After clicking on the select tool you will get "Select Options" underneath your tools. In this you will see those four options again. Let me explain what they mean. 


If you have vertex selected then you will be able to select those in your mesh. Vertexes are those little square things in your mesh.

When the face option is selected then when you click on your mesh it will select a triangle between three vertexes.


The group option will select the group of vertexes/faces which you are currently working on. I personally have never used this option and I will explain why when we move to the "Groups" tabs.


The joint option is for selecting joints. I've never used this option while making objects so I cannot say much about it. Using it is for when you are working on bodyshop meshes.

Underneath these options you have two boxes which you can check.
The first one is "Ignore Backfaces". When this is checked then it will ignore any vertexes which are directly behind the one you are selecting.

The second one is "By Vertex". If you have the Vertex option selected then this will not be selectable. Though when the Face or Group option is selected then this will be available. When checked this will allow you to select any face or group which this vertex is connected to.

Move: This tool allows you to move those vertexes, faces, or groups that you just selected.

It too has it's own options menu which shows underneath the tools. As you can see it is different then the "Select Options".


In the "Move Options" you see three field where you can type in numbers with "X", "Y", and "Z" underneath them. These point to the axes. The "X" axis goes from left to right, the "Y" axis goes up and down and the "Z" goes from front to back. So when you fill in a number above one or more of these field and click move the mesh will move in those directions. When you fill in 1 into any of these field the mesh will move one square over.


You could also keep them all at 0.0 and just unselect one, two, or none of them and then click on the one of the the screens and drag.


At the bottom of the "Move Options" you have a pull down menu. This will change from which point the mesh is moved. I like to keep it on Relative but feel free to try them all and see which one you like most.

Rotate: This works just like the move except instead of moving the vertexes, faces, or groups it will rotate them.


It has a options menu that looks a lot like the "Move Options" except in the fields you fill in the number of degrees for the angle you want. Below the axes you also have two selectable options, Global and Local. To be honest I have never used the "Local" option so I am not to sure how it differs from global.


Scale: This too has it's own options which looks a lot like the last two. 


The "Scale Options" start with three selectable options. These refer to the point at where the mesh will be scaled. I always use the Center Of Mass options but you may prefer the others. The field above the axes should be filled in with percentages, 1 = 100% thus if you want to scale the mesh by say 50% you would type 0.5 into the field.


The next seven tools are your shape tools. The first two I don't use but they make vertexes and faces, just as they suggest. 

So I am going to start with the Sphere tool. After clicking on the Sphere tool you will see the Sphere Options below, Stacks and Slices. Stacks refer to the amount of faces being stacked on top of each other. The more stacks there are the rounder your sphere will seem from the front and side views. Slices refer to the amount of faces there are around the sphere, the more slices there are the rounder you sphere will appear from the top and bottom view. Remember the more stacks and slices you add the greater the poly counts will become.


Once you have the amount of stacks and slices you would like then all you have to do is click and drag your mouse pointer on one of the screens. The more you drag the larger it becomes. This can be said for all of the shape tools.


The GeoSphere tool forms a sphere just like the other except the faces are placed differently. You can also use this tool to make round objects because of this. The GeoSphere Options are limited to a single field called Depth.


I don't use this tool often so I am not really sure about the scale it is using but the higher the number you put in the larger amount of faces are created.


The Box tool makes a cube shape. It does not have it's own options. When you click and drag your mouse on one of the screen it will create a box shape, the longer you drag the larger it becomes.


The Cylinder tools makes a tube shape. Once again by clicking and dragging your mouse you can determine the size of the cylinder. Like the sphere it has stacks and slices which you can change in the Cylinder Options. The stacks tell how many "tubes" you want stacked on top of one another. The slices act just like they do for the sphere, the more slices you have the smoother or rounder the tube is. 


The Cylinder Options also has a drop down menu. This menu lets you choose how you want to close the ends of your tubes. You have four different options; Don't Close, Close with extra vertex, Close with triangle fan, and Close with triangle strip. Once again by clicking and dragging your mouse you can determine the size of the cylinder.


The last shape tool is the Plane tool. This is one of my favorites. The Plane Tool creates a flat one sided mesh which can be manipulated easily. In the "Plane Options" you have two fields called HDivs (Horizontal Divisions) and VDivs (Vertical Divisions) and two selections you can check called Turn edge each row and Turn edge each column.


One division is one square made up of two faces. So if you fill in HDivs = 3 and VDivs = 5 you will get a plane consisting of 3x5 squares or 3x10 faces. By checking on Turn edge each row, Turn edge each column, either, or neither you can change the direction of the faces which make up each division.


Underneath the Shaping Tools you have three more tools called Extrude, Joint, and Comment. I've never used those so don't know anything about them. We are just going to skip over those and talk about the last three selection options.

Redraw All Viewports: When checked the screens or viewports will update constantly with each adjustment you make. When unchecked the screens will only update when you click on them. I always have this checked, it is easier for me.

Auto Tool: When checked this will automatically go back to the last tool you where using. Example: You go to your select tool and select a vertex then you use your move tool to move that vertex, when you unclick your mouse it will automatically go back to the selection tool. I also keep this one checked.

Snap To Grid: When checked it will snap any shape you make to the grid. This is great when you want a perfectly shaped shape but in my own opinion it makes it hard to do much more than that. I tend to only check this box when I need a perfect square or sphere for something. Other then that I keep it unchecked.

That is all for the Models tab, now we can go one to the Groups tab.

In the Groups tab you will see which groups you have open. Every new shape you make will add a new group to the list. The groups are also what will become subsets for your mesh.


The Groups Tab also has it's own tools. Thankfully these can be explained a lot quicker then the Models tools.

Select: When you highlight one or more of your groups and click select it will make them activated (turn red on your screens). You can then go back to your models tab and move them if you like (this is why I don't use the "Groups" selection in the "Select Tools" under the models tab. I find this way quicker. You can also select your group by double clicking it in the list.

After you have selected your group or groups you can us the other tools given.

Hide: This hides the selected group or groups.
Delete: This deletes the selected group or groups.
Regroup: This will regroup the the selected groups. You can also use this to group together different parts from different groups by selecting them first in the Models Tab by using the Face selection.
Rename: This will rename the selected group or groups. You simply select your group, type in a new name and click on Rename.
Comment: This lets you add a note to the the selected group or groups. I never use this one but I can see where it would come in handy.
Up and Down: This lets you move the selected group or groups up or down in the list.

Under the Group Tools you have another tool called Smoothing Groups. I hardly use this but some times you have too. If your mesh isn't smoothing properly (showing grey or black faces, looking pointy or misshapen) then you can select the face on the mesh which is messed up and then clicking on one of the numbers given, finishing my clicking "Assign". This will usually fix any bad faces you get. For the most part you shouldn't need to use this but I thought I would add it just in case.

Under that there is a selection box called Auto Smooth. This automatically smooths the faces of the mesh making them look smooth. When unchecked your mesh will look rough and pointy. When making objects it is better to keep this checked.

Next is the Materials Tab. This is the last tab we are going to be looking at.

This tab will come in handy later after you have UVMapped your mesh. Here you can add a texture to your mesh. Once again I have never used the first four tolls listed or the sliders under them but by using them you can change how the texture looks on the mesh here in Milkshape. It will not look like that in game. I find by leaving these alone I get a closer match to what it will look like in game.

Under those you have two selectable field with none written next to them. This is were you will chose your texture from a file. By clicking none after you have added a texture it will remove it from the mesh.

At the bottom you have a few more selections. We will only be using the New, Delete, and Assign selections so I will tell you about them.

The New selection lets you start a new material file. This is what will hold your texture in Milkshape. After clicking this you will see that "Material" followed by a number will appear in your materials list. below that a sphere will appear. This really doesn't do anything but show the texture around it.


After clicking new you can now choose your texture by clicking on the first selection field which says "". After finding your texture in your computer folders it will show it's name in the place of .


Then you need to select which group this texture is going to be going on. So you go back to your groups tab and select which ever group you like. Then coming back to your Materials Tab you click Assign. This will add the texture to that groups mesh.


Lastly if you want to remove the texture from the Materials List then you highlight the material and click Delete.

That's it for the main tools and tabs. Next I will go over a few of the menus at the top left of the program. I will not go over everything but the main things you are most likely to use on a regular bases.

Firstly when creating for The Sims 2 you will need to save your meshes as .OBJs. When you are finished with your mesh or are wanting to UVMap a part of it then you go to File -> Export -> Wavefront OBJ and save it to your computer.


When you are ready to import your mesh back into MilkShape or continue working on a mesh then you simply go to File -> Import -> Wavefront OBJ.

It is also a good idea to save your progress as a milkshape file just to be safe. I've had times where after UVMapping and trying to re-import the mesh when something goes wrong and my mesh becomes broken. To do this you go to File -> Save As / Save.


 Under Edit you have a list of selections which are pretty much self explanatory.


Under the "Vertex" menu you have a lot of tools you can use on your vertexes. I am going to explain the ones I use on a regular basis but I suggest you play with the others to get a better understanding of them.


I will start with the Snap Together options which will snap any vertexes you have selected together at a middle point.

Weld Together will merge two vertexes which are close to one another together at a middle point creating one vertex from them. I use this mostly when I am finished with the mesh to make sure everything is as smooth as possible.

Unweld Separates a vertex into two again after it has been welded.

Mirror: Front - Back, Left - Right, Top - Bottom will mirror your mesh to the direction given. I find this useful when wanting two sides to be exactly the same as one another, like on a chair or couch. After duplicating your mesh you then choose one of these option and to mirror it.

Align Normals (may need this plug-in) will usually fix the way the light hits the mesh when it doesn't appear right, like after rotating your mesh.

Extended Manual Edit (may need this plug-in) allows you to manually change the position of a vertex or multiple vertexes. I really like to use this tool when I am trying to line up to group to appear as one before welding them together.

Next we have the Face menu. I only really use 2 of these options so I will go over them with you which are pretty self explanatory.


First the Reverse Vertex Order. This will change which way the face is showing on your mesh.

Smooth All will smooth all the faces of your mesh so it appears nice and smooth.

Lastly we will skip to the Windows menu. You can decide how you want you Milkshape to look here. 


I am only going to explain the Texture Coordinate Editor though since I tend to use it a lot. What it does is it opens a new window which will show your material (once added) with the UVMap over it. This comes in handy when you want to tweak your UVMap to make sure the texture looks the best it can on your mesh. You might need to select your mesh then click on the Texture Coordinate Editor window to have the UVMap show up. You can then select, move, scale, or rotate certain parts of the UVMap to make it appear better on your mesh.

 And lastly we have the "Right Clicking Menu". This allows you to adjust your MilkShape a little more to your liking. You can play around with these and try them out to your hearts content. I strongly suggest you turn off backfaces before exporting your mesh to put it in your game. If not you might miss a gap somewhere in the mesh.


So that is it for this tutorial. Next time I will be showing you how I actually begin my meshing experience. I hope to see you then.

(Please excuse any spelling or grammar mistakes, I tried to fix all I could find but I might have missed some).
read more "Meshing 101 - Keeping it Simple pt. 2"

Popular Posts